What is Automatic1111


Brief of automatic1111
Automatic1111 is an open-source project that refers to a web-based GUI built on top of the Stable Diffusion AI image generation model. We also call it Stable Diffusion WebUI or A1111.
It's a browser interface based on Gradio library for stable diffusion and It provides a user-friendly interface for users to:
- Generate images from text prompt (txt2img)
- Edit and improve existing images (img2img)
- Other advanced features such as model training etc
This guide will provide step-by-step instructions on how to install Stable Diffusion Web UI, along with helpful tips that cover basic usage.
How to install Automatic1111
Required dependencies
- NVidia GPU (recommended)
- Python 3.10.6 and Git
One-click installation on Win 10/11 with NVida GPU using release package
- Download
sd.webui.zipfrom v1.0.0-pre - Extract the zip file at any location you desired.
- Run
update.batto update web UI to the latest version, wait till finish then close the window. - Run
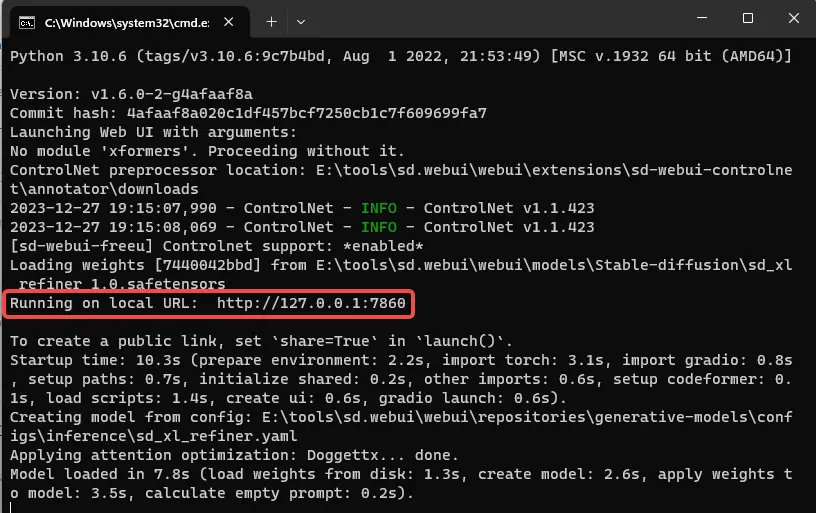
run.batto launch web UI. Once you see the message "Running on local URL: http://127.0.0.1:7860", you can open the link to access the web UI interface.
Automatic Installation on windows
- Install Python 3.10.6 , checking "Add Python to PATH".
- Install git.
- Download the stable-diffusion-webui repository, for example by running
git clone https://github.com/AUTOMATIC1111/stable-diffusion-webui.git. - Run
webui-user.bat.
Automatic Installation on Linux
- Install the dependencies:
# Debian-based:
sudo apt install wget git python3 python3-venv libgl1 libglib2.0-0
# Red Hat-based:
sudo dnf install wget git python3 gperftools-libs libglvnd-glx
libglvnd
# Arch-based:
sudo pacman -S wget git python3- Go to the directory you would like the web UI to be installed and execute the following command:
wget -q https://raw.githubusercontent.com/AUTOMATIC1111/stable-diffusion-webui/master/webui.sh- Run
webui.sh.
You are all set
When you see this page in your browser, it means that all the environments are ready.
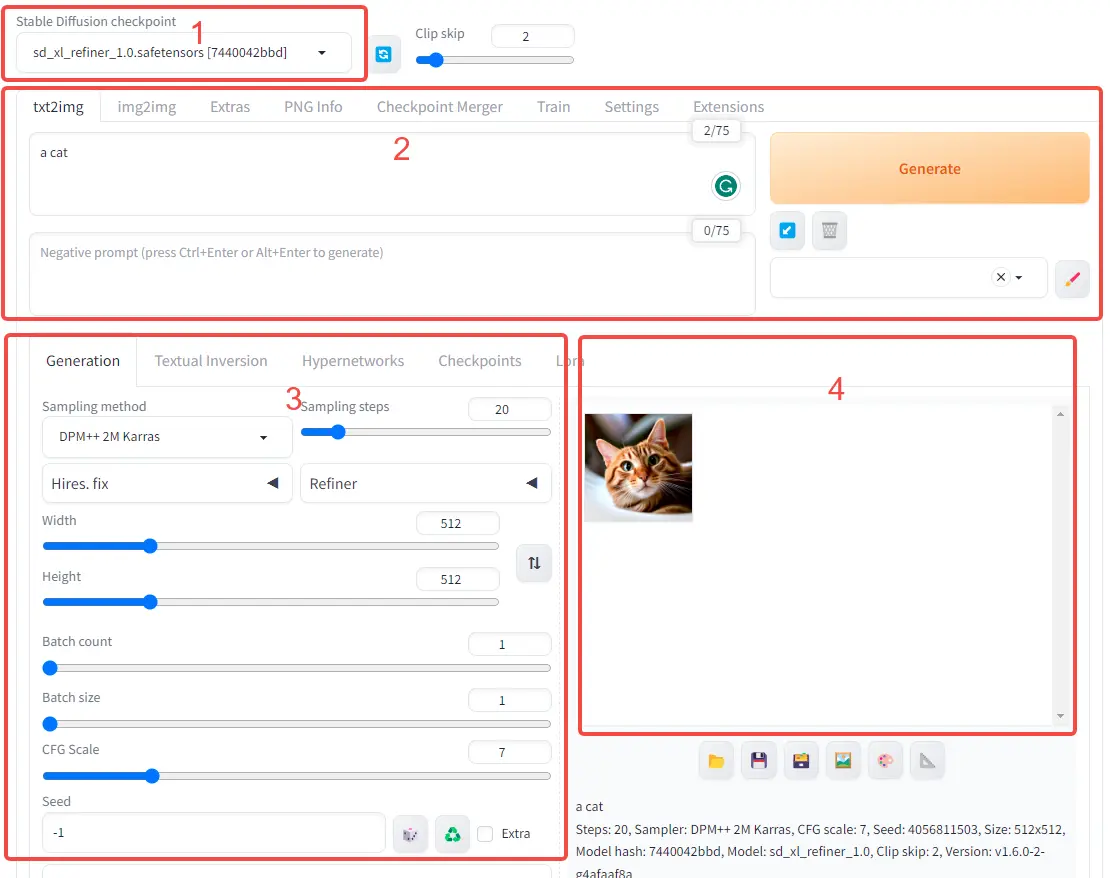
- Section 1: Indicate what checkpoint you are using right now.
- Section 2: Simply input your prompt and negative prompt and let the tool generate images for you.
- Section 3: The area for modifying image generation parameters such as image dimensions, batch size, sampling steps, etc.
- Section 4: The generated images will be displayed in this area.
I will talk a little bit more about how to tune with different parameters and how to optimize in the next article.